Hi everyone
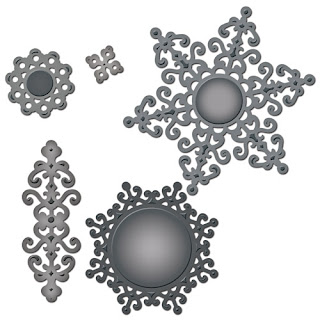
As promised, I'm returning today to show you my second project that I created with the wonderful new Spellbinders die templates - S5-058 Ironwork Accents and S5-059 Ironwork Motifs. All the info about these including their sizes can be found in this post.
I hope all of you enjoyed the Blog Frenzy - I am incredibly lucky to be on the Spellbinders Design Team and get to play with these amazing new designs.
So here is my second project - an altered book.
I felt a tad guilty at ripping apart a 1913 copy of Dickens’ Tale of Two Cities!! But I bought it for a mere 50 pence at a boot sale. Bargain!
1. Remove the pages in one go from the book cover, you may need to use a craft knife to carefully slice down the page edge. Do not worry if it does not cut cleanly, this is a shabby chic creation, the more shabby the better! Keep all those book pages, great for future projects.
2. Using white paint, (I went budget and used some left over decorating emulsion!)
Any paint medium will do. Paint the outer edge of the book cover. Allow to dry.
3. Taking sandpaper, sand until you are happy with the amount of whiteness achieved.
It gets dusty so you may want to do this bit outside!
4. To make the inner box that fits inside your book, I used a porridge box that was the right size, raid your cupboards but if you cannot find anything suitable, you can make one from chipboard.
5. Cut to fit. I reinforced the edges with some chipboard.
6. Using any piece of cardstock, create a small platform to fit inside your box base.
(Measure your base, cut cardstock 3/4" bigger, score the edges, nip the corners, fold and adhere).
7 You can now decorate the outer edges of your box, cut panels of paper, adhere with strong glue or double sided tape, ink the edges.
8. Position on to your book cover and stick down. Stick the book spine to the inner box too - plenty of strong double sided tape!
Cover your base platform and book inner cover with your desired paper. Ink edges, I ink quite heavily as I love the aged distressed look (on projects!)
9. Now the fun bit - lots of decorating, distressing and inking. I wanted to have a mixture of cardstock, papers and fabric and the Spellbinders Grand Calibur Die Cutting Machine allows you to do this with ease.
Cut and emboss a mixture of the die templates to suit.
10. Cut and emboss decorative borders, layering these works beautifully for dimension.
11. Don't the S5-059 Ironwork Motifs look like gorgeous hinges!?
12. Then I cut a combination of fabric shapes from the die templates.
This flower is made in the exact same way as my video tutorial which can be found in this post.
13. The beginnings of designing the cover.
Remember you can cut into your die-cuts to make different designs.
Remember you can cut into your die-cuts to make different designs.
14. For the inside platform, I started with the layered decorative border and rub-ons on to some lovely script paper (Kaisercraft - Timeless Collection).
15. And continuing with more Ironwork Accents and Motifs.
These designs lend themselves perfectly to all different patterns.
16. Returning to the outer cover I added S4-328 Foliage and S3-146 Butterflies Two - (of course! No project of mine would look finished without a butterfly!)
The design is truly your own, see where it leads you...
Some more shots of the finished item
I hope you like it! Have a go - alter a book today!
And if you do - leave me a link with your comment as I would love to see how you are all inspired.


3 comments:
Totally gorgeous Christine! X
Hello Christine,
that's a Wonderful idea, wow that looks breathtakingly beautiful and the idea with the stamp inside the book past sooo good together. You have a nice feel and the umszusetzen hands. I think it's beautiful. Was warmly greeted by me and I wish you a nice week.
LG
Stella
Love this thanks for sharing, I just bought my first two sets of spellbinders, ironwork accents being one of them, so I am looking for different ways of using them this is brilliant :)
Post a Comment